On this page · 15 sections
- The 90-second version
- Chapter 1 — Why Sheds, Why Now
- Chapter 2 — Permits and Licensing
- Chapter 3 — What You Actually Need to Start
- Chapter 4 — Your First Build: 10×12 Gable Shed, Start to Finish
- Chapter 5 — Pricing: The Model That Doesn't Leave Money on the Table
- Chapter 6 — Finding Customers Without Spending a Dollar on Ads
- Chapter 7 — The Pre-Cut + Bundle Workflow
- Chapter 8 — When (and How) to Hire Help
- Chapter 8.5 — Contracts, Deposits, and Payment Terms
- Chapter 9 — Scaling: From 1 Shed a Month to 4
- Chapter 10 — The Mistakes That Kill New Shed Builders
- Chapter 11 — Your First 90 Days: A Concrete Action Plan
- Appendix
- About the author
Guide
How to Start a Shed Building Business
A practical playbook for designing, pricing, and selling small structures in most U.S. markets.
A practical playbook for designing, pricing, and selling small structures, from someone who has been building, quoting, and selling sheds. Compressed version first; longer story and the deep version after.
The 90-second version
- The market is real. Backyard offices, ADU-curious homeowners, and storage-strapped families have made small custom sheds a $7K–$25K product that one person can deliver.
- Permits and licensing are lighter for small sheds, but always local. Most U.S. jurisdictions exempt small accessory structures from a building permit (the IRC baseline is 200 sq ft), and many states don't require a contractor's license for small jobs. The specifics vary by state, county, and address. Call your AHJ before you quote anything. Nothing here is legal advice.
- You can start lean. About $2,500 in tools, $1,200–$2,400/yr in general liability insurance, a half-ton pickup, and ~$190/mo of software. LLC and EIN are cheap and quick.
- Pricing has four parts. Materials at cost + 15% markup + labor at a blended rate + a management fee (≈17.5% of materials + labor) + profit (≈20% of project gross). Show the customer one number.
- First customers are organic. Neighborhood Facebook groups, yard signs at completed builds, a well-tuned Google Business Profile, and the drive-by referral loop. Paid ads later.
- Pre-cut and bundle. Every cut you can make off-site saves 2–3 hours on the job and a lot of noise at the customer's house.
- Hire small, contract on paper. First hire is a day-rate builder, not a partner. Always a written contract and a 50% deposit before work begins.
- 90-day target. Two to three paid builds, five-plus Google reviews, $15K–$30K of revenue, $5K–$10K of profit, and a repeatable workflow.
Read the full guide below for the how. Or design your first quote free and follow along.
How this guide came together
The first shed I built was for my own backyard. A 14×24 lean-to. 12 ft ceiling on the high side, 10 ft on the low side. Tall enough to put a squat rack against the back wall and press a barbell overhead. Standing desk on the long wall. Eventually a fold-down bed and a small bathroom on the far end so my mother-in-law has a place to stay when she comes to visit.
She stays with us. We have two kids under two, so she comes more often than she used to, and "more often" is the trend for the next several years. She needs her own space, and the house needs somewhere to put the gym, the desk, and the rest of the stuff that piles up against the walls of a small house with small kids in it.
My dad, my brother-in-law, and my nephew came over on Saturdays. The four of us framed it, sheathed it, and got it dried in over about three or four weekends. I designed it in 3D first, drew it, cut a materials list, and ordered everything from Lowe's Pro Desk. By the time the roof was on, I had a notebook full of things the existing shed-design tools could not do, and the shape of the software product I wanted to build instead. ShedBuilder.ai is that product.
I'm writing this guide for the person I was a year ago. Someone who can swing a hammer, likes building things, and suspects there's a real business hiding inside the simplest structure in residential construction. There is.
You don't need a general contractor's license, a partner, or ten years of framing experience. You need a truck, about $2,500 in tools, a pricing model that actually pays you, and a handful of customers who already want what you're about to learn how to sell.
The numbers and workflows below come from real builds, real Pro Desk orders, and real customer conversations. Let's go.
Chapter 1 — Why Sheds, Why Now
Sheds are the easiest way into residential construction right now.
The demand is real and durable
A few things have stacked at once:
| Trend | What it means for shed demand |
|---|---|
| Permanent remote/hybrid work | Backyard offices, studios, and "she-sheds" went from luxury to mainstream |
| ADU and casita awareness | Homeowners are thinking about backyard structures the way they think about kitchen renovations |
| Storage crunch from rising home prices | People are staying in smaller homes longer and need outdoor storage to make it work |
None of those are going away.
The margins are real
The math on a baseline 10×12 gable shed:
| Line | Amount |
|---|---|
| Customer price | $9,400 |
| Materials (Pro Desk pricing) | $3,100 |
| Labor (two builders × 3 days × $40/hr) | $1,920 |
| Management overhead (17.5%) | $1,645 |
| Gross profit | $2,735 |
| Gross margin | 29% |
A 12×16 with a metal roof and a workbench package can net $4,500-6,000. A 14×24 lean-to ADU shell runs $18,000-25,000 and clears $5K-8K in profit.
Three to four builds a month at average ticket clears $10-15K of operator income. That's a real income on roughly 12-15 build days per month.
Why sheds beat the other entry-level trades
I've looked at every adjacent business. The honest comparison:
| Path | Why it is harder than sheds |
|---|---|
| Handyman | Twenty small jobs to make what one shed makes. Scheduling nightmare. |
| Decks | Permits in most jurisdictions. Footings inspected. Customer expectations are higher. |
| Fencing | Race to the bottom on price. Two-truck operations dominate. |
| Full GC remodels | License required almost everywhere. Permits on everything. Subs to manage. |
| Pole barns | Specialized equipment. Concrete crews. Bigger insurance. |
Sheds are small enough to escape permits in most states and big enough to charge real money. One person can run the whole job.
Who this guide is for
- People in the trades who want to run their own thing
- Coaches, teachers, firefighters, military, and anyone else with summers, weekends, or shift work
- DIYers who built their own shed and realized they could sell that skill
- Career changers who want a low-capital path into construction
- Existing handymen and remodelers who want a higher-margin product to anchor their week
This guide is not for anyone who wants to start with custom homes, who hates physical work, or who needs a paycheck this Friday. The first ninety days are an investment.
Why this guide exists
I built ShedBuilder.ai because the software I wanted for my own backyard build didn't exist. Then I kept hearing the same three questions from other builders. What do I price this at. Do I need a permit. How do I get my first customer. The guide I wished I had didn't exist either, so I wrote it.
Everything in here is what I actually do, drawn from real builds, real Pro Desk orders, and conversations with builders running shed shops today.
Chapter 2 — Permits and Licensing
In many U.S. jurisdictions, sheds under a certain size are exempt from building permits, and many states don't require a residential contractor's license for small jobs. That's why sheds are a friendlier on-ramp than decks, additions, or remodels — the rules tend to be lighter for small accessory structures. But "lighter" is not "none," and the specifics vary enough that you have to do the homework on every market you serve.
The IRC baseline
Most U.S. states adopt some version of the International Residential Code with local amendments. As a baseline, the IRC has historically exempted one-story accessory structures up to 200 sq ft from a building permit (IRC R105.2). Many states adopt this directly. Some go stricter (California's baseline is 120 sq ft), some go more generous (Pennsylvania has a 1,000 sq ft agricultural exemption). Cities and counties amend the state code on top of all that.
A few illustrative examples (not universal rules — confirm each against the current code in your specific jurisdiction):
- California: The state-adopted California Residential Code has a 120 sq ft accessory-structure baseline; counties and cities frequently tighten it further. Electrical, plumbing, and mechanical work always need their own permit. Contractor licensing is handled by CSLB, which requires a license for any job over $1,000 in combined labor and materials (or any job where a permit is required, or one involving employees).
- North Carolina: No square-footage cap at the state level. The trigger is wall height — any wall over 12 ft tall requires a permit regardless of footprint. State contractor licensing through the NC Licensing Board for General Contractors kicks in at $40,000 of project value.
- Florida: 100–200 sq ft depending on county. Coastal counties add hurricane wind-load engineering and tie-down requirements that change the cost model significantly.
- Texas / most southeastern and midwestern states: Generally adopt the 200 sq ft IRC baseline. No statewide general contractor licensing for residential work in TX, though specific trades (electrical, plumbing) are licensed by the state and most cities require business registration.
This is a starting point for your research, not a quote sheet. Codes get amended on multi-year cycles, and a county-level change can move the threshold up or down (Laramie County, WY moved its accessory-structure threshold from 200 to 400 sq ft in late 2025, for example). The authoritative source is always the AHJ for permits and the state contractor licensing board for licensing — never a guide like this one.
Licensing varies just as much
A few state-level patterns to be aware of (again, examples — verify against the current statute in your state):
- California (CSLB) requires a contractor's license for any job over $1,000 in combined labor and materials, including unlicensed shed work — even on a 200-sq-ft permit-exempt structure. There are narrow handyman exemptions, but they shrink quickly once labor is involved.
- North Carolina requires a general contractor's license once a single project (or set of related projects) is valued at $40,000 or more. Below that, most shed work doesn't need a state contractor license, though city/county business licenses may apply.
- Texas has no statewide general contractor licensing for residential work, but specific trades (electrical, plumbing) are licensed at the state level and most cities require business registration.
- Most other states sit somewhere between these poles. Some have project-value thresholds, some require licensing for any paid construction work, some are essentially open below a certain dollar amount.
The pattern that holds across most jurisdictions: small sheds, no permits or licensing in the picture; large sheds and ADUs, permits and often licensing. Where exactly the line sits is local. Call the AHJ for permits and your state contractor licensing board for licensing.
What "permit-exempt" usually does and doesn't mean
When a shed qualifies for a permit exemption, it generally means:
- No building permit pulled for the structure itself
- No structural inspection from the building department
- No stamped engineering plans required
It almost never means:
- You can ignore setbacks. Most jurisdictions still require 5–10 ft from property lines, sometimes more.
- You can ignore HOA rules. Those are separate from code and can be very strict.
- You can do electrical or plumbing work without a permit. Those trades are permitted separately almost everywhere, even on permit-exempt structures.
- You can ignore zoning. Some areas restrict accessory-structure use, height, or count regardless of permit status.
Always tell the customer: "Permit-exempt isn't the same as rule-free. Check your HOA, check your setbacks, and if you want power, we'll bring in a licensed electrician who pulls their own permit."
Watch the wall-height triggers, not just the footprint
North Carolina is the classic example: any wall over 12 ft tall requires a permit regardless of square footage. Other states have similar non-square-footage triggers (ridge height limits, eave height limits, story counts, snow-load thresholds, wildfire setbacks). Pull your state's residential code and your county's amendments before you commit to a tall design.
Electrical is always permitted
Every state, every county, every time: if the shed gets power, an electrician pulls a permit and does the work. This isn't optional. Do not run a single wire yourself unless you're a licensed electrician.
The good news: this is also the cleanest sub-out in the business. You build the shell. You hand the customer a list of three local electricians. They handle it directly. You are out of the chain.
Chapter 3 — What You Actually Need to Start
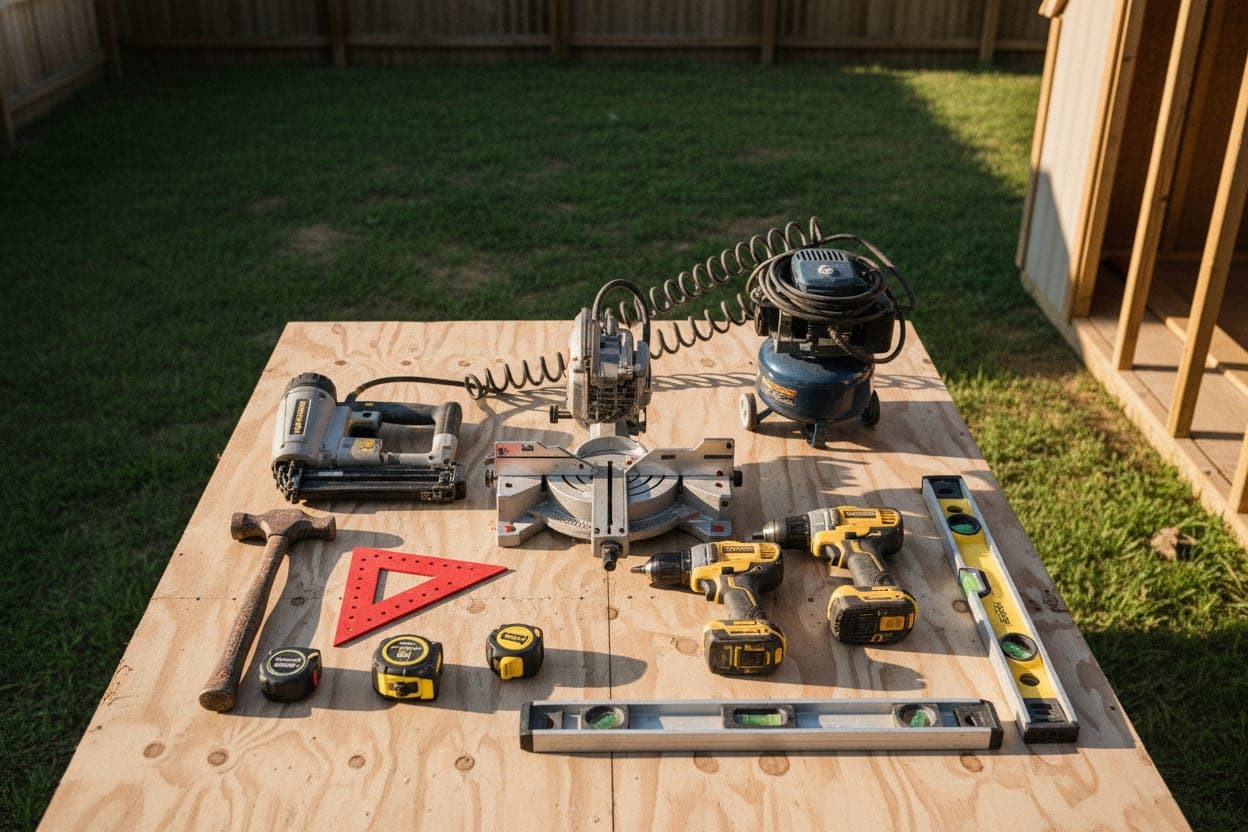
I see a lot of people delay starting because they think they need more than they do. Here's the actual list.
Tools — the $2,500 starter kit
This is what I started with. You can probably use 60% of what you already own if you have done any home projects.
| Tool | Why | Approx cost |
|---|---|---|
| 21° framing nailer | Faster than swinging a hammer all day. Essential. | $250 |
| 6-gal pancake compressor | Drives the nailer. Quiet enough to not annoy neighbors. | $200 |
| 7-1/4" circular saw (corded) | Workhorse for studs, plates, sheathing | $150 |
| 10" or 12" miter saw with stand | The best time-saver on a job site | $400 |
| 18V impact driver + drill combo | For decking screws, hangers, and hinges | $250 |
| 1/2" extension cord, 100 ft | Cheaper than batteries dying mid-cut | $50 |
| 4 ft level, 2 ft level, torpedo level | Buy good ones. Cheap levels cost you twice. | $120 |
| Speed square + framing square + carpenter pencils | The trinity. | $40 |
| 25 ft tape × 3 | You will lose two of them. | $45 |
| 28 oz framing hammer | For when the nailer fails. | $50 |
| Sawhorses (2 pair) | Cut station. Pair them with a 2×4 platform. | $80 |
| 6 ft and 8 ft step ladders | Wall raising, top plates, rafters. | $200 |
| 24 ft extension ladder | Ridge work and roof access. | $250 |
| Chalk line + plumb bob | Marking out the floor frame on the foundation. | $25 |
| Tool belt + nail bags | Quality leather lasts ten years. | $150 |
| Safety: glasses, ear pro, gloves, knee pads, boots | Don't skip. | $200 |
| Total | ~$2,210 |
Buy mid-tier. Skip Harbor Freight on the saws and nailer. DeWalt, Milwaukee, Makita — pick one ecosystem and stick to it for the cordless line.
The vehicle question
| Vehicle | Verdict |
|---|---|
| Half-ton pickup (F-150, Silverado 1500, Ram 1500) | Minimum. You can run a year of builds out of one. |
| 3/4-ton pickup | Better. Comfortable hauling 4,000+ lbs of materials. |
| Cargo van | Possible, but limits what you can haul. Skip. |
| Open landscape trailer | Workable, but materials get wet. |
| 16 ft enclosed trailer with rear ramp | Buy this when you can afford it. |
I run a 16 ft enclosed cargo trailer with a rear ramp door. It changed the business:
- Mobile cut station. Miter saw lives in the trailer, plugged in, ready.
- Weather protection. Lumber stays dry between job days.
- Tool security. Lock it and leave it on site overnight.
- Branded surface. Customer drives by your trailer at the previous job and calls you.
- Pre-load efficiency. Load tomorrow's materials tonight; show up at 7am and start building.
You can start without one. Plan to add it within your first 12-18 months.
Insurance — non-negotiable from day one
You need general liability insurance. Period. The day before your first paid job, this is in place.
| Coverage | Why |
|---|---|
| General liability ($1M/$2M) | Customer trips over your extension cord. Your trailer rolls into their fence. The shed roof leaks and damages their lawn mower. |
| Inland marine / tool coverage | Trailer break-in. Tools stolen off the site. |
| Commercial auto | Your personal auto policy does NOT cover work use. This is the one most new builders miss. |
Budget: $1,200-2,400 per year total at this stage. Get quotes from Hiscox, Next Insurance, Thimble, and a local independent agent. The local agent will usually beat the online quotes by 15-25% once they understand your scope. (These ranges are typical, not guaranteed — your rates depend on state, claims history, payroll, and gross revenue.)
Business setup
Do this in the first two weeks:
- LLC — file with your Secretary of State. $50-300 depending on state. Use IncFile, Northwest, or your CPA. Do not pay LegalZoom $800.
- EIN — free, ten minutes, IRS website. Do not pay anyone for this.
- Business bank account — Chase, BoA, or a local credit union. Get a debit card and one credit card on it.
- Bookkeeping — Wave (free) or QuickBooks Solopreneur ($20/mo). Connect the bank account. Categorize weekly.
- Phone number — Google Voice (free) or OpenPhone ($15/mo) so your personal cell stays separate.
Software stack
This is what I run. Swap pieces if you want, but the stack below works today.
| Tool | Purpose | Cost |
|---|---|---|
| ShedBuilder.ai | Design, quote, cut list, materials | $149/mo |
| Stripe / Square | Deposits and final payments | 2.9% + 30¢ |
| Google Workspace | Email, calendar, drive | $7/mo |
| QuickBooks Solopreneur | Books and taxes | $20/mo |
| OpenPhone | Business line + texting | $15/mo |
| Total | ~$190/mo |
That's the full software stack. Less than one materials run.
What you do NOT need to start
- A GC license (in most states, for jobs under threshold)
- A bond
- A storefront
- An office
- Employees
- A website with a configurator (yet)
- A logo designed by an agency
- A 3D CAD program
- Years of framing experience
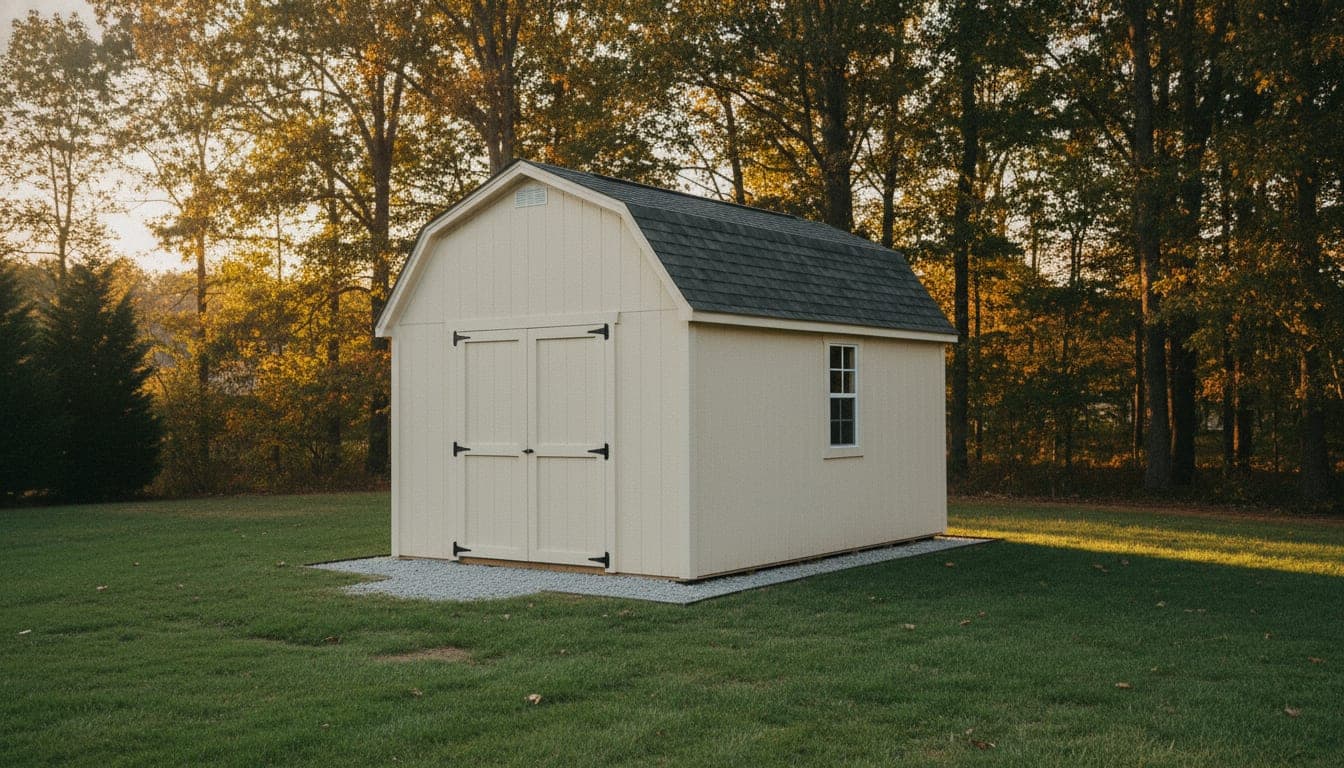
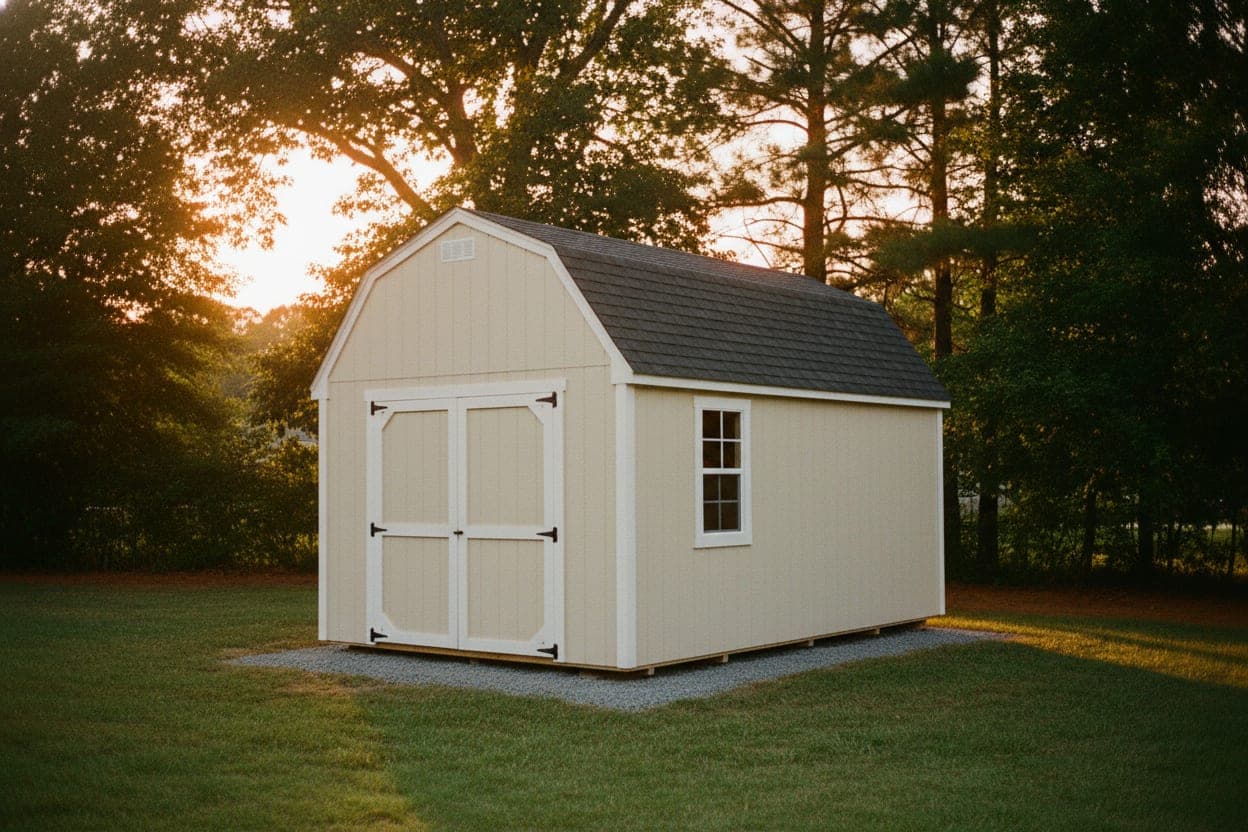
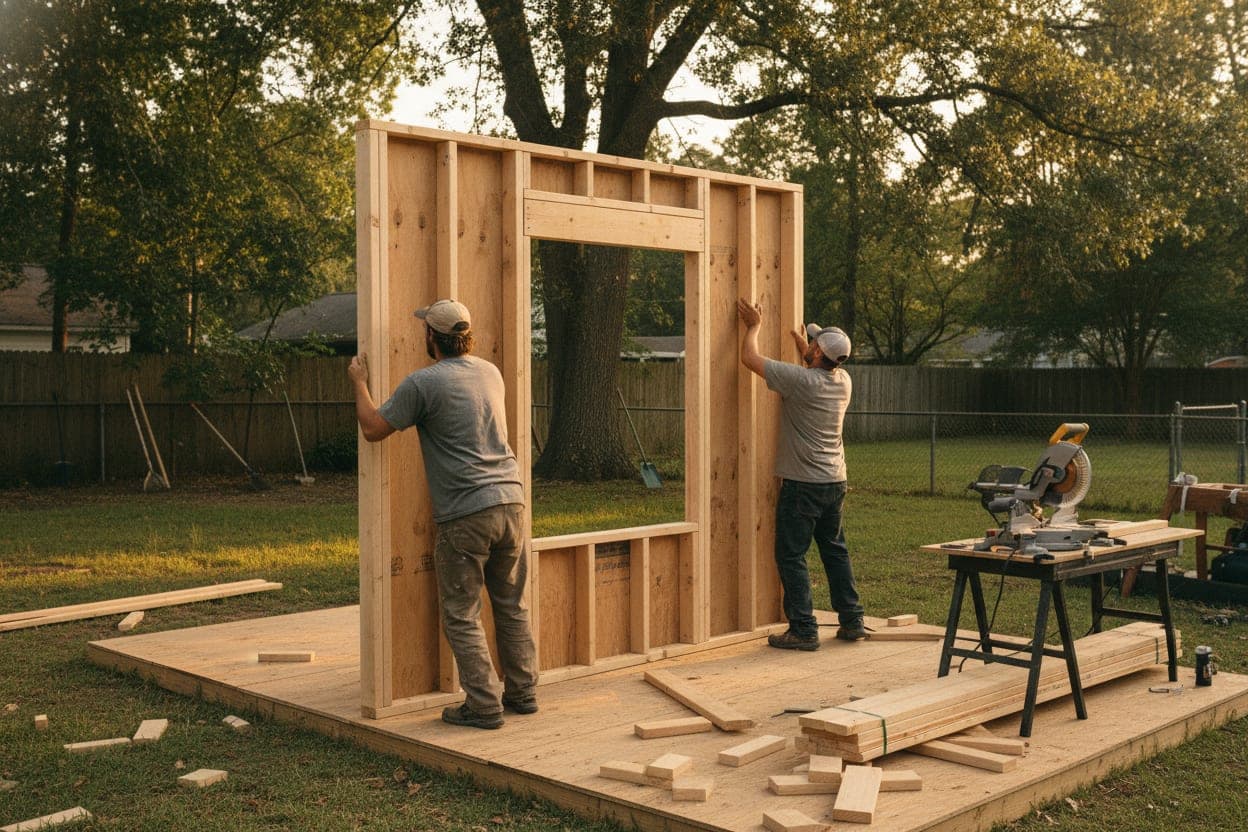
Chapter 4 — Your First Build: 10×12 Gable Shed, Start to Finish
A real job, end to end. Numbers, timeline, conversations, and the bumps along the way.
The lead
A customer named Mike found us through a neighborhood Facebook group. He sent a message at 9:47 PM on a Sunday: "Hey, do you build 10×12 sheds? Need one in my backyard for lawn equipment and a workbench."
I replied at 7:02 AM Monday: "Yes — happy to help. Can you send a photo of where you want it, and your address? I'll have a rough number to you by lunch."
That response time matters. Speed kills indecision. The customer who messages five builders on Sunday night will hire whoever is the first to look like a real business.
The quote — 90 minutes of work
By 10 AM I had Mike's address pulled up in Google Earth and I had spent 30 minutes in ShedBuilder.ai:
- 10 ft × 12 ft × 8 ft walls
- Gable roof, 6/12 pitch
- LP SmartSide siding (mid-tier)
- Architectural shingles, 30-year
- Double 5 ft front door, single 24×36 window on the side
- Gravel pad foundation (he confirmed his backyard slopes mildly)
- His local zip code pulled in for materials pricing
The configurator gave me:
| Output | Value |
|---|---|
| Materials BOM with Pro Desk pricing | $3,142 |
| Cut list (47 framing members, optimized) | 4.2% waste |
| Labor estimate | 38 hours, 2-person crew |
| Internal cost | $5,847 |
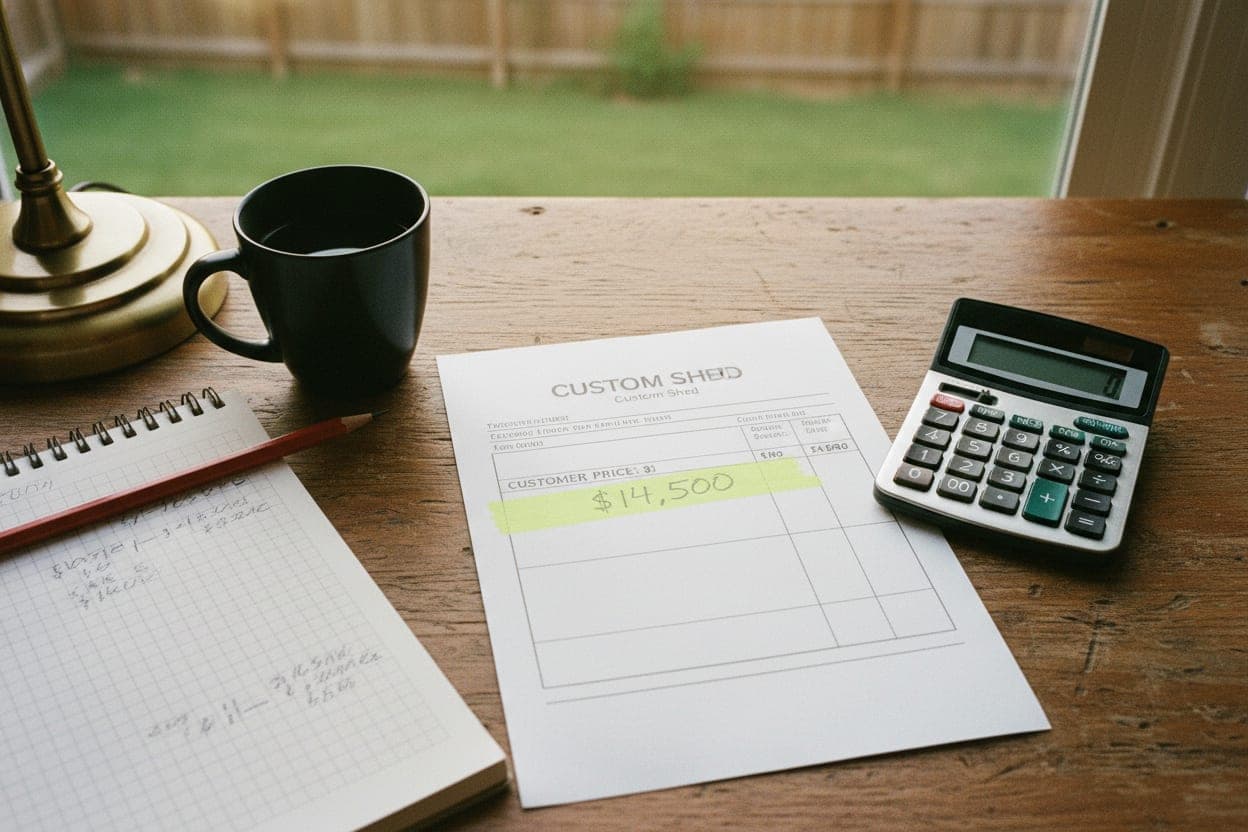
| Quoted price | $9,400 |
| Gross margin | 38% |
I emailed Mike a proposal with three things: a 3D render of his shed, a one-page summary of what's included, and the price. I didn't include the full BOM or the labor breakdown. Customers do not need to see your cost structure. They need to see what they get and what they pay.
The site visit
Mike texted back the next morning: "Looks great. Can you come look at the spot?"
I showed up at 8 AM Wednesday. The visit took 20 minutes. What I check on every site visit:
| Check | Why |
|---|---|
| Access width and overhead clearance | Can I get the trailer in? Are there branches in the way? |
| Slope and drainage | Does the pad need leveling or French drain? |
| Property lines and setbacks | Where exactly does the shed sit? Pull out a tape. |
| Overhead obstructions | Power lines, branches, satellite dishes |
| Existing structures | Where will roof runoff land? |
| HOA flags | Fences, signs, similar structures already approved |
| Power access | If they want electrical sub-out, where is the main panel? |
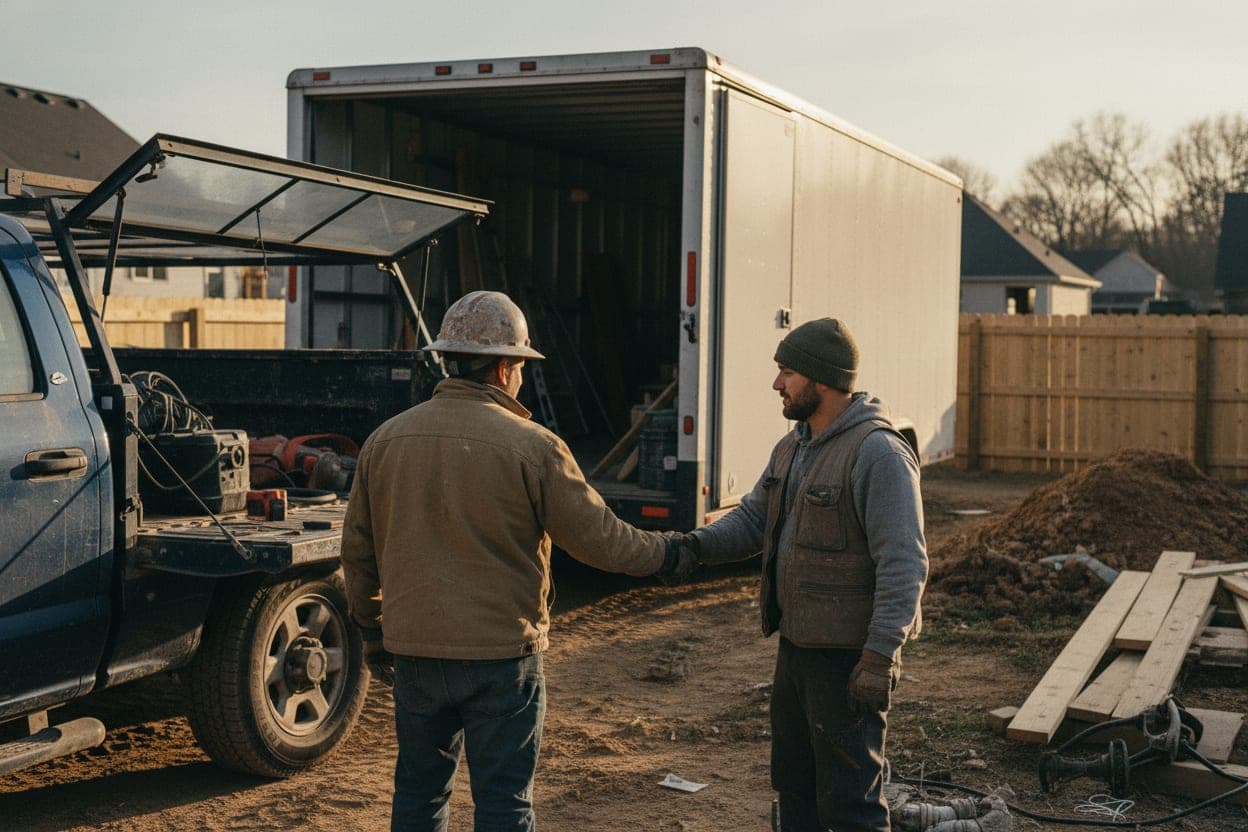
I shook Mike's hand, confirmed the price, and told him the deposit was 50% to lock the build week. He paid the $4,700 deposit by card on the spot via my Stripe link.
The pre-cut
Two days before the build, I spent four hours in my trailer at home cutting and bundling:
- All studs cut to length (87 5/8" for 8 ft walls with double top plate and single bottom plate)
- All headers built (2× 2×8 with 1/2" plywood spacer)
- Floor joists cut and labeled
- Rafters cut with birdsmouth and plumb cut
- Plates cut, drilled, and labeled by wall (N, E, S, W)
- Sheathing pre-cut for openings
Everything bundled by wall and labeled. The cut list from ShedBuilder.ai drove every cut.
Pre-cutting at the shop saves me 4-6 hours of on-site time per build. The customer's neighbors love it because the noisy work happens at my place.
Day 1 — Floor and walls (Thursday)
| Time | Task |
|---|---|
| 7:00 AM | Arrive on site, level gravel pad, check square |
| 8:00 AM | Set 4×4 skid runners, attach floor frame |
| 9:30 AM | Sheet floor with 3/4" T&G plywood, glue and screw |
| 10:30 AM | Frame walls flat on the deck (one at a time) |
| 12:30 PM | Lunch |
| 1:00 PM | Raise walls, plumb, brace |
| 2:30 PM | Double top plates, corner ties |
| 4:00 PM | Sheet exterior walls |
| 5:30 PM | Buttoned up, tools loaded, on the road |
Two builders. Ten hours including drive time.
Day 2 — Roof and dry-in (Friday)
| Time | Task |
|---|---|
| 7:00 AM | Arrive, set ridge board with temp posts |
| 8:00 AM | Install rafters (16" OC, 12 pair) |
| 10:00 AM | Roof sheathing |
| 12:00 PM | Lunch |
| 12:30 PM | Drip edge, ice & water shield at eaves, felt |
| 1:30 PM | Install shingles |
| 4:30 PM | Ridge cap, final shingle details |
| 5:00 PM | Buttoned up, dry-in complete |
Day 3 — Siding, doors, trim (Saturday)
| Time | Task |
|---|---|
| 7:30 AM | Install Tyvek housewrap |
| 8:30 AM | Hang LP SmartSide panels |
| 11:00 AM | Cut and trim corners, eaves, rakes |
| 12:00 PM | Lunch |
| 12:30 PM | Hang double doors, install window |
| 2:30 PM | Install trim, caulk, paint touch-up |
| 4:00 PM | Final walk with Mike |
| 4:30 PM | Collect final payment |
Three days, two builders, one shed. Mike paid the final invoice before I left the site.
The walk-through and payment
This is the most important 30 minutes of the job. I walk the customer around the shed with a printed punch-list:
- All sides of siding inspected
- Doors open, close, and latch smoothly
- Window opens and seals
- Roof inspected from a ladder for any missed nails
- Trim caulked and clean
- Site cleaned, all scraps and nails removed (run a magnet)
- Photos taken with the customer next to the shed (for marketing — I always ask permission)
- Final invoice handed over, paid before I leave
Mike paid the remaining $4,700 by card. I sent the receipt by text within five minutes. I asked him to leave a Google review, and I texted him a direct link.
He left a 5-star review the next day. Three weeks later his neighbor messaged me about a 12×16.
The numbers from this job
These are the actual line items from a 10×12 build in the Charlotte, NC metro. Customer name has been changed; everything else is from the books.
| Line | Amount |
|---|---|
| Revenue | $9,400 |
| Materials (paid to Lowe's Pro Desk) | $3,142 |
| Fuel and consumables | $185 |
| Labor (me + 1 builder × 3 days, including pre-cut) | $1,920 |
| Management/overhead (17.5%) | $1,645 |
| Insurance, software, fees allocation | $310 |
| Profit | $2,198 |
| Profit margin | 23% |
This is a typical mid-pack job. The margin lands between 20-35% depending on materials choices, distance, and complexity. Higher-end jobs (metal roofs, custom doors, lofts) clear higher percentages because the customer pays a premium for the upgrade and my labor stays similar.
Chapter 5 — Pricing: The Model That Doesn't Leave Money on the Table
Pricing is where most new builders lose. They look at materials, add 15-20%, add some "labor," and quote a number that gets them the job but leaves them with $300 of profit at the end of a week of work.
Below is the model I use on every quote. It's the same model commercial GCs have used for fifty years. It scales: the same formula that prices a 10×12 prices a 14×24, and someday it will price an ADU.
The four components
Every job has four cost components and one profit target.
| Component | What it covers | How it's calculated |
|---|---|---|
| Materials | Lumber, sheathing, siding, roofing, trim, doors, windows, fasteners, hardware | Pro Desk pricing × (1 + waste factor) |
| Labor | Builder hours × blended rate | Hours × $80/hr (2-person crew, blended) |
| Management fee | Estimating, customer comms, site visits, scheduling, billing, warranty support | 17.5% of (materials + labor) |
| Profit target | Your income above labor | 20% of project gross |
Let's run a 10×12 gable through it.
If the component is rendered as a table:
| Line | Amount | % of total |
|---|---|---|
| Materials at cost | $3,142 | 33% |
| Materials markup (15%) | $471 | 5% |
| Labor (38 hrs × $80) | $3,040 | 32% |
| Subtotal | $6,653 | |
| Management fee (17.5% of subtotal) | $1,164 | 12% |
| Profit (20% of final gross) | $1,879 | 20% |
| Customer price | $9,400 | 100% |
The customer sees one number: $9,400.
Why this beats "cost plus markup"
The cost-plus-markup approach (price = materials × 2, or materials × 1.5 + "labor") has three problems:
- It does not pay you for the time you spend on the job that isn't swinging a hammer (quoting, site visits, ordering, billing, callbacks)
- It does not separate "labor income" from "business profit" — if you're paying yourself the labor rate, you are an employee of yourself, not an owner
- It does not scale. At higher project values the markup needs to compress, and cost-plus gives you no framework for compressing it cleanly
The four-component model separates labor income (what you pay yourself for time on site) from business profit (what the business earns above labor). Both should grow as you scale.
Why I show the customer one number
The customer does not need to know your cost structure. They need to know:
- What they get (3D render + spec sheet)
- What they pay (one number)
- What they pay when (50/50 deposit/completion)
- When you start and when you finish
Itemized quotes invite negotiation on the line items. "Can you use cheaper shingles? Can you do it without the trim?" The single-number quote keeps the conversation about whether they want the shed at the price quoted.
If a customer asks for a breakdown, I give them a tier breakdown instead:
| Tier | What changes | Price |
|---|---|---|
| Good | T1-11 siding, 3-tab shingles, standard steel door | $8,200 |
| Better (recommended) | LP SmartSide, architectural shingles, fiberglass door | $9,400 |
| Best | Board & batten or metal, standing seam roof, premium hardware | $11,800 |
This is the contractor upsell pattern. Most customers pick Better. A handful pick Best. Almost nobody picks Good once they see all three.
The crew incentive structure
I learned this one the slow way. If you pay your second builder a flat hourly rate, they have zero incentive to finish ahead of schedule and a strong incentive to slow down on the last day to stretch the hours.
What I do instead:
- Base hourly rate: $25-35/hr depending on experience
- 5% of gross sale paid as a bonus on job completion
- Bonus is paid only if the customer signs off on the punch list without revision
On a $9,400 job, the lead builder takes home $470 in bonus on top of their hours. They are now motivated to finish clean, finish fast, and leave the customer happy enough that the bonus pays out.
It's one of the few labor structures I've used where the owner and the crew actually want the same thing.
Materials markup of 15%
Some builders skip the materials markup entirely. They eat the time of running the Pro Desk order, the truck mileage to pick it up, and the storage. Do not do this.
The 15% covers:
- Truck wear, fuel, and time picking up materials
- Storage and protection of materials between pickup and install
- The risk of damaged or wrong materials (you eat that, not the customer)
- The expertise of knowing exactly what to buy in what quantity
It's a fair number. Lowe's, Home Depot, and Menards have a Pro Desk discount of 5-10% on bulk orders if you're registered as a Pro. Sometimes the customer's markup ends up being 22-25% after your Pro discount lands. That's yours to keep.
Workspace settings
In ShedBuilder.ai, the crew settings page lets you set your hourly rate, management fee percentage, and profit margin once. Every quote you generate after that uses your numbers. The configurator shows the customer a running price as they change options, and shows you the internal waterfall in a toggle.
Holding the line on discounts
Customers will ask for a discount. The rule: don't discount the price. Reduce the scope.
If a customer says "$9,400 is more than I wanted to spend," say:
"I hear you. The price reflects everything we discussed. If you want to bring the number down, I can swap to a Good tier finish — that's $8,200 with T1-11 and 3-tab. Same shed, lower finish package."
This protects your margin and lets the customer make a real trade-off. If they still want $7,500 with the Better finish, the answer is no, politely.
Chapter 6 — Finding Customers Without Spending a Dollar on Ads
I've spent zero dollars on paid advertising. Every customer has come from one of six channels. Here they are, ranked by what produces the most volume for the least effort.
Channel 1 — Neighborhood Facebook groups
This is the #1 source of leads in my market and probably yours.
- Search Facebook for "[your city] neighborhood" and "[your county] neighbors"
- Join every group within a 45-minute drive radius
- Post a short intro when you join (group rules permitting)
- Watch for posts asking about shed builders. Reply publicly and DM the poster.
A working intro post:
"Hi [Group]. I'm Adam. I run a small shed-building operation here in [area]. We build custom sheds in 3-5 days, $7K-15K range. Happy to answer questions or send a quote. Photos of recent builds in the first comment."
Drop 3-4 photos in the first comment. That's it. Do not post weekly. Do not be the guy who spams the group. One intro post per group. Then watch for asks and respond.
Lead volume from this channel for me: 2-4 qualified inbounds per week per active market.
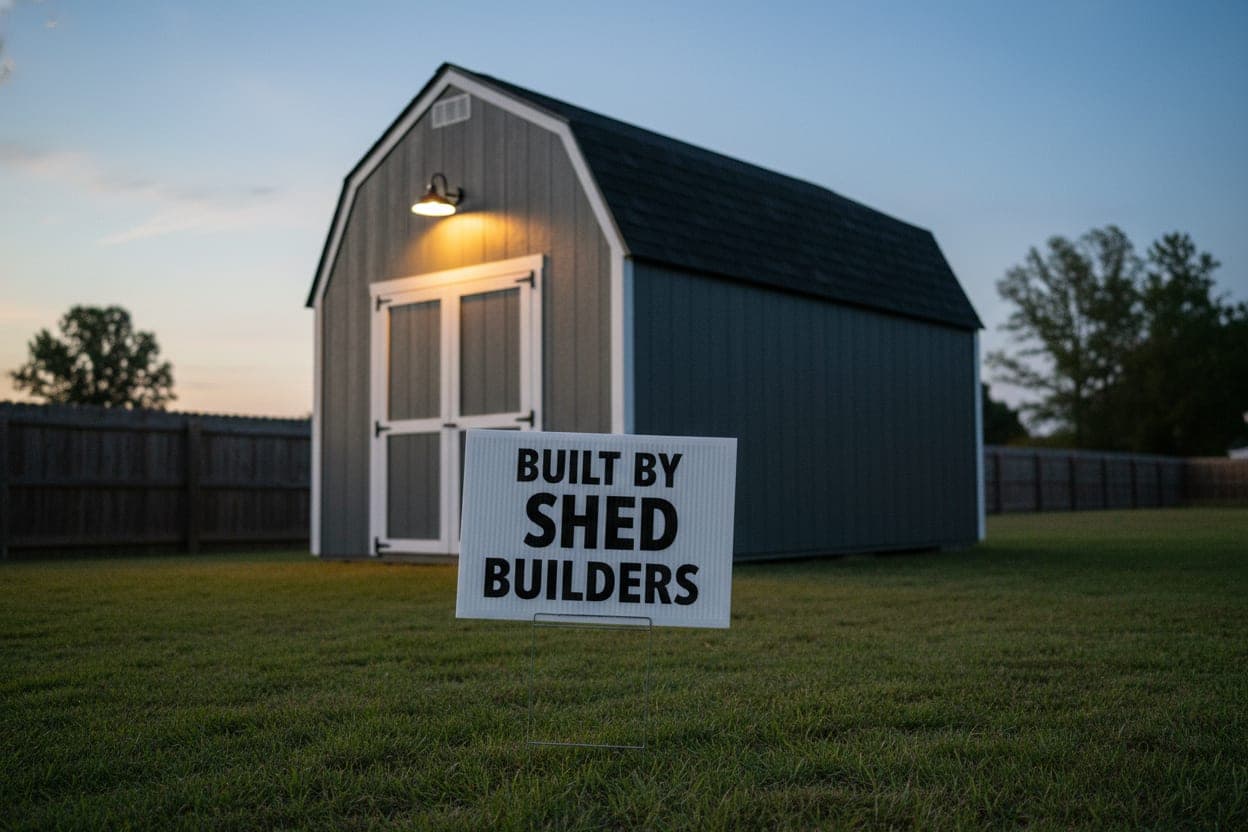
Channel 2 — Yard signs at completed builds
For every shed I build, I ask the customer if I can leave a yard sign for two weeks. About 75% say yes.
| Element | Spec |
|---|---|
| Size | 24" × 18" double-sided |
| Color | High contrast, readable from 50 ft |
| Content | "Built by [Your Business Name]" + phone + URL + QR code |
| Cost | $12-18 each at any local print shop |
The QR code goes to a landing page with photos of recent builds and a "get a quote" form. A yard sign in a high-traffic neighborhood generates 1-3 calls per week while it sits there. Cost per lead: roughly $0.
Channel 3 — Google Business Profile
This is free and most new builders set it up wrong.
| Setup step | Detail |
|---|---|
| Claim profile | google.com/business — verify by postcard or phone |
| Business name | "[City] Shed Builders" (use city + keyword) |
| Category | "Shed Builder" (primary), "General Contractor" (secondary) |
| Service area | Set radius to your real service area |
| Hours | Set real hours, including weekends if you work them |
| Photos | Add 10-15 photos of completed builds, immediately and weekly |
| Posts | Post a new "update" weekly with a photo (signals freshness to Google) |
| Reviews | Ask every customer. Aim for 5+ in your first 90 days. |
A well-tuned GBP ranks for "shed builder near me" and "shed builder [city]" within 2-4 months. After that, it produces 2-5 inbounds per week with zero ongoing work.
Channel 4 — The drive-by referral
Every shed you build is a billboard. The neighbors see it. They tell their friends. Six months later, someone three streets over messages you.
You amplify this by:
- Building visible signage on the trailer ("[Your Business Name] — sheds in 3 days — text 704-XXX-XXXX")
- Wearing branded shirts on site
- Leaving the trailer parked at the site overnight (free advertising every time someone drives past)
- Photographing every finished build and posting to Instagram, Facebook, and your GBP
Channel 5 — The "starter shed" referral loop
If you can build your own shed (or a friend's), do it. Use the build to test your pricing, your workflow, and your photo content. Post the whole thing to social media from start to finish, then offer the first three real customers a $500 discount in exchange for a video testimonial.
Three filmed testimonials in your first 90 days will close more deals than any ad spend you could make at that stage.
Channel 6 — Niche community partnerships
I haven't run direct partnerships myself. I've seen them work for other builders:
- Hardware store relationships — the Lowe's Pro Desk staff knows every contractor in the area. Get to know them. They send referrals.
- Real estate agents — staging a backyard with a shed adds resale value. Find 3-5 active agents and offer them a referral fee.
- Landscape designers — they design backyards but do not build structures. Perfect complement.
- Tractor and equipment dealers — people who buy zero-turns need a place to store them.
What I do NOT recommend
| Channel | Why to skip |
|---|---|
| Thumbtack | Pay-per-lead, low intent, racing other contractors to the bottom |
| HomeAdvisor / Angi | Same model, often worse leads |
| Google Ads (early) | Expensive without conversion data. Skip for the first 90 days. |
| Facebook ads (early) | Same. Organic works fine until you hit volume limits. |
| Flyers and door hangers | Low conversion in residential. Skip. |
| Cold-calling neighborhoods | Bad ROI. Customers come to you when they're ready. |
When to start paid ads
Two conditions:
- You have closed 10+ jobs and know your average ticket and close rate
- Your organic channels are maxed out (more leads than you can handle)
Until then, paid ads are a tax on impatience. Organic works. Use the time to build the case studies that make ads work later.
Chapter 7 — The Pre-Cut + Bundle Workflow
This is the operational difference between a builder who spends five days on a 10×12 and one who spends three. The pre-cut and bundle workflow is how I run every job.
The principle
Every cut you can make off-site, you should make off-site. Saw time at the customer's house means noise, dust, a scrap pile, and slower progress. The same cut at your shop or in your trailer is just a cut.
What gets pre-cut
For a standard 10×12 gable, what comes off the saw at home:
| Item | Quantity | Notes |
|---|---|---|
| Wall studs | ~50 at 87 5/8" | For 8 ft walls, double top + single bottom plate |
| Wall plates | 8 (top and bottom for each wall) | Cut to length, drilled for anchors where needed |
| Headers | 2-4 | Built up from 2×8s with 1/2" plywood spacer |
| King and jack studs | 8-12 | Pre-cut to opening height |
| Cripple studs | 6-10 | Above and below openings |
| Sill plates for windows | 2-3 | |
| Floor joists | ~15 | Cut to width minus rim board |
| Rim boards | 4 | Cut to length |
| Rafters | 20-24 | Birdsmouth, plumb cut, tail cut all done |
| Ridge board | 1 | Cut to length |
| Sheathing panel cuts | As needed for openings | Standard 4×8 panels stay full |
I do not pre-cut siding or trim. Both need to be measured on the wall after framing settles.
How to bundle
After cutting, bundle by wall and label:
| Bundle | Contents | Label |
|---|---|---|
| FLOOR | Joists, rim boards, blocking | "FLOOR — 10×12" |
| WALL-N (back) | Studs, plates, sheathing precuts | "N WALL — solid, no openings" |
| WALL-S (front) | Studs, plates, header, jacks, kings, cripples | "S WALL — double 5 ft door" |
| WALL-E | Studs, plates | "E WALL — window 24×36" |
| WALL-W | Studs, plates | "W WALL — solid" |
| ROOF | Rafters, ridge, gable studs, collar ties | "ROOF — 6/12 gable" |
| HARDWARE | Hangers, hurricane ties, fasteners, anchors | "HARDWARE BAG" |
Each bundle is strapped together with bright pink banding (visible in the trailer, easy to spot). Labels are sharpie on a 4×6 cardboard tag stapled to the bundle.
The cut list from ShedBuilder.ai
The configurator generates the cut list with bin-packing optimization. For a 10×12 gable, you typically get:
- ~47 framing members cut from 23 sticks of stock lumber
- ~4-5% waste (vs. 15-20% if you cut on the fly)
- Each cut labeled with its target member (e.g. "Stud N-7" or "Rafter R-3")
I print the cut list, work through it on the miter saw, and check each cut off as I go. The label on each piece is written in pencil on the stud before I bundle it.
The on-site sequence
Arriving on site with bundled, labeled materials changes the entire build experience:
| Time saved | Why |
|---|---|
| 2-3 hours of saw time per build | All cuts pre-made |
| 30-45 min of "where did I put that piece" time | Everything labeled |
| 1-2 hours of cleanup | No scrap pile to remove |
| 30 min of customer reassurance | Quiet, organized site reads as "professional" |
The customer-experience side is the underrated benefit. A bundled, labeled job site looks like a real operation. Your competitors show up with a pile of lumber in the back of a pickup and a circular saw on a sawhorse. You show up with labeled bundles and a finished plan. That difference closes the next job before you've finished the current one.
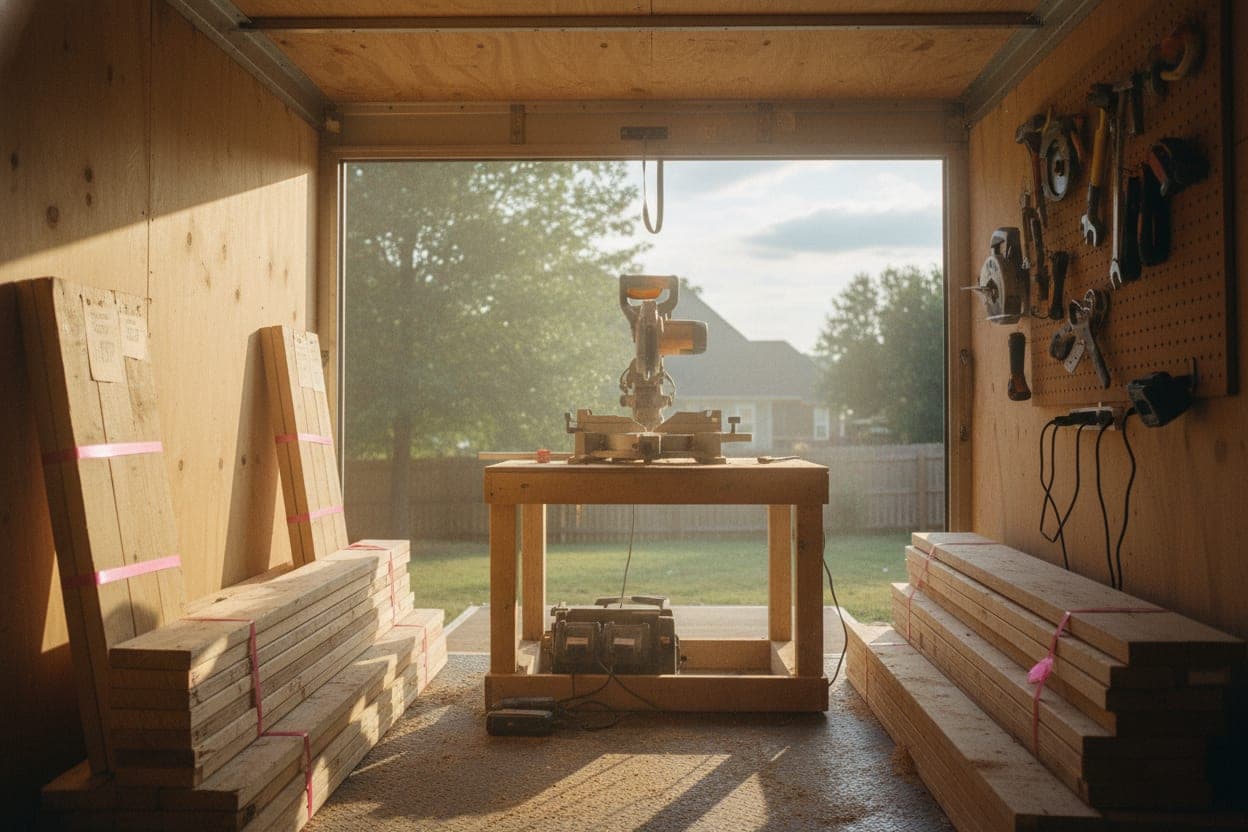
The trailer cut station
If you have an enclosed trailer, set it up as a permanent cut station:
- Miter saw mounted at one end on a built-in stand
- Outfeed roller on both sides
- 25 ft tape and 4 ft level on a clip
- Cut list clipboard hangs next to the saw
- Power strip wired to a single 25 ft extension cord
- Shop vac mounted, hooked to the saw
When you arrive on site, plug the cord into the customer's exterior outlet (or your generator), open the back doors of the trailer, and you have a covered, dust-collected, organized cut station in 90 seconds.
One thing pre-cutting doesn't fix
Pre-cutting saves time on framing. It does not save time on sheathing, siding, roofing, or trim. Those are still measured and cut on site. Plan your day around that — framing happens fast, then the day slows down through dry-in and finish.
Chapter 8 — When (and How) to Hire Help
You'll build your first three to five sheds with one helper (often a family member or friend) or alone if the build is small enough. Around build 6-10 you'll hit the ceiling of solo capacity and have to make hiring decisions. Here's the order I'd make them in.
Hire 1: a day-rate laborer, not a partner
Your first hire is not a co-founder. Do not split equity. Do not give them a percentage of the business. They are a builder you pay by the day.
| Structure | Why |
|---|---|
| 1099 or W-2 day-rate or hourly | Simpler tax and termination |
| $25-35/hr base for an experienced framer | Market rate in most regions |
| $18-22/hr for an apprentice/laborer | Reasonable starting wage |
| Plus 5% gross sale bonus on completion | Aligned incentives |
| Paid weekly | Predictable for them, simple for you |
Your first hire is a second pair of hands. They frame walls with you, sheath the roof with you, hold the ridge while you set rafters. You're still the foreman, the salesperson, the estimator, and the only person on the customer's phone.
Where to find them
| Source | Notes |
|---|---|
| Construction trades schools / community colleges | Best for entry-level, eager apprentices |
| Spanish-speaking labor networks | Highly skilled framers, often available at fair rates |
| Indeed / Craigslist (yes, Craigslist still works) | Filter aggressively — most applicants are not serious |
| Referral from another builder | Highest signal hire |
| Amish/Mennonite networks | The best hire if you have access to it |
The Amish/Mennonite network
In states with significant Amish or Mennonite populations (Pennsylvania, Ohio, Indiana, Michigan, Minnesota, Wisconsin, Iowa, Kentucky, Tennessee, Missouri), there is a network of highly skilled, fast, reliable builders who often work as crews-for-hire.
I've worked with a few through a friend's connection, and they're some of the best framers I've ever been on a job with. Two of them will frame and sheath a 12×16 in a day.
How to find them: ask at a local lumberyard or hardware store in a rural area, or ask any contractor over 50. The networks are word-of-mouth and tight, but if you're a paying customer with steady work, you can usually get an introduction.
Rates vary, but typically $35-50/hr per builder or a flat per-job rate. Often cheaper than W-2 labor and faster.
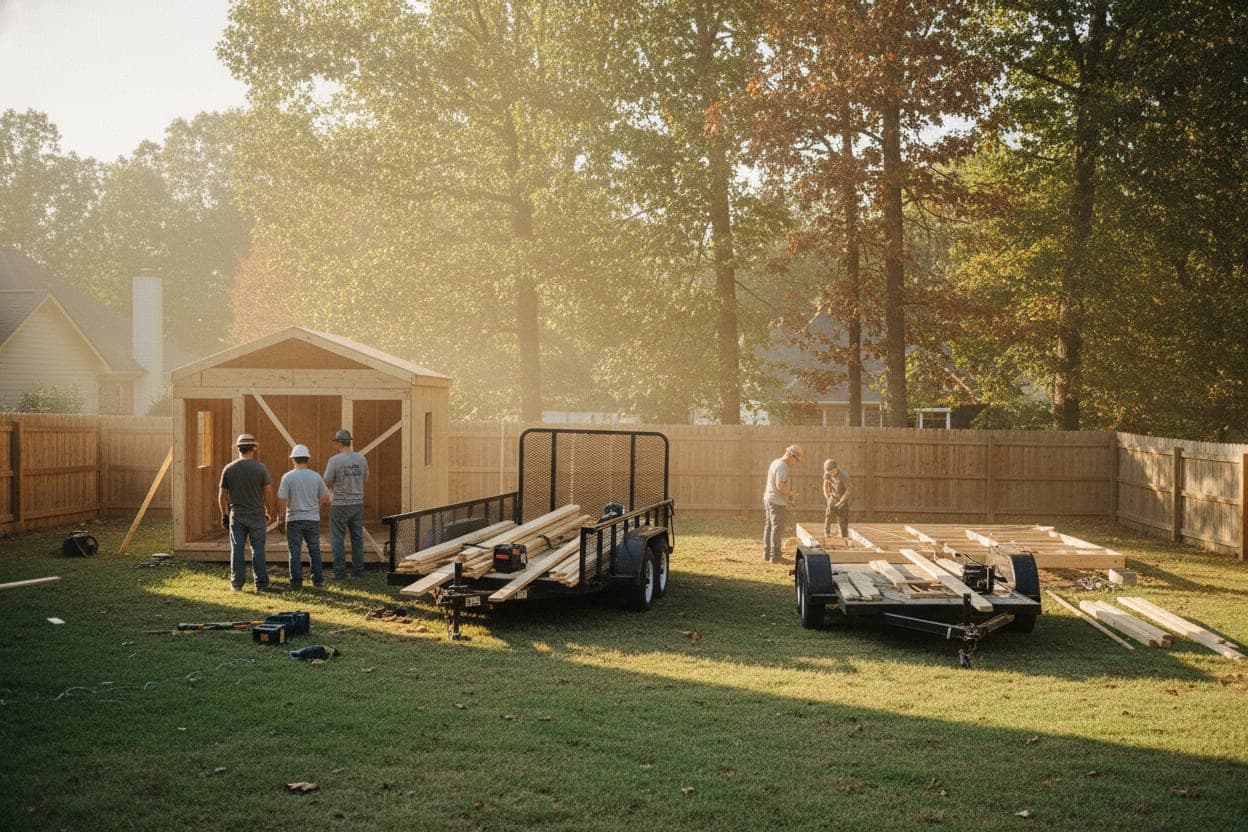
Hire 2-3: a second crew
After hire 1 is working out (usually 3-6 months in), the next decision is whether to add a second crew so you can run two jobs in a week.
This is the leap from "shed builder" to "shed building business."
| Component | Detail |
|---|---|
| Crew lead | Your most experienced builder, paid lead rate ($35-45/hr) + 5% gross sale bonus |
| Second builder | $25-35/hr |
| Vehicle | Either give the crew lead a company truck or pay mileage on theirs |
| Tools | Provide a duplicate kit (~$3-4K) OR have crew bring their own and pay a tool fee |
At this point the owner (you) moves off the tools. Your job becomes estimating, customer communication, scheduling, materials, and quality control. You still show up to every final walk-through, but you stop swinging a hammer on routine jobs.
This transition is the hardest part of the business. Most shed builders never make it: they stay solo or one-crew and cap out around $150-200K of revenue. The ones who break $400K are the ones who let go of the hammer.
Subcontract what you should not do yourself
Some work you should never do yourself, even if you know how:
| Trade | Why sub it out |
|---|---|
| Electrical | Always permitted. Liability is enormous. Sub it. |
| Concrete (slab foundations) | Different skill set, different equipment, narrow margin |
| HVAC | Trade-specific. Not in scope for sheds anyway. |
| Plumbing (rare for sheds) | Same as electrical. |
| Finish carpentry on ADUs | If you scale to ADUs, sub the trim and cabinets. |
Build a list of three reliable subs per trade in your area. Pay them on time, every time. They will fit you in when others can't.
Employee vs. 1099
For most shed builders: start with 1099 contractors, transition to W-2 employees when you have two crews and steady year-round work.
| 1099 | W-2 |
|---|---|
| Pay only for hours worked | Predictable team |
| No payroll taxes or benefits to manage | But: payroll taxes, workers' comp, unemployment, possibly health |
| Workers comp may still apply | Cleaner legal standing |
| Lower commitment | Higher accountability |
Check your state's rules. Some states (California, Massachusetts, New Jersey) have strict tests for 1099 status that will reclassify your workers as W-2 regardless of how you label them. Talk to a local CPA before your first hire.
Chapter 8.5 — Contracts, Deposits, and Payment Terms
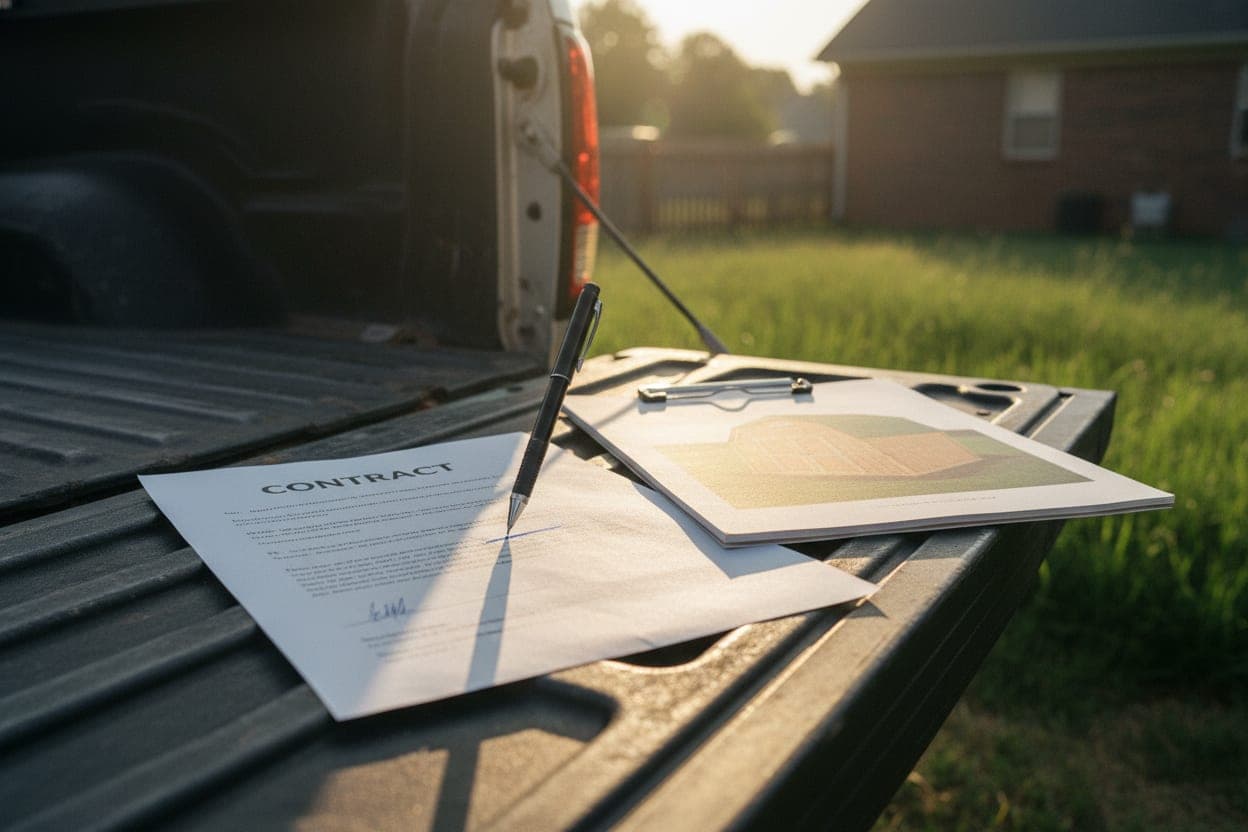
The fastest way to lose money in this business is to skip the contract. The second fastest is to start work without a deposit. I won't start a build without both.
The deposit structure
| Stage | Amount | Trigger |
|---|---|---|
| Proposal accepted | 50% deposit | Customer signs contract, deposit lands |
| Build complete | Remaining 50% | Final walk-through, punch list signed |
This is the standard split for residential construction under $50K. Some builders use 33/33/33 or 25/50/25. I prefer 50/50 because it's simple, predictable, and the customer is never paying for work they have not seen.
Why 50% upfront
A 10×12 build costs me about $3,100-3,500 in materials, all paid upfront at Pro Desk. If I start without a deposit, I'm financing the customer's build with my cash. If they cancel mid-build (it happens), I'm holding $3K of materials I cannot easily resell.
50% covers materials with a buffer. It also signals commitment from the customer. A deposit is the line between a "lead" and a "job."
What goes in the contract
I use a one-page contract for every shed build. Anything longer scares customers and signals overlawyering. What has to be in it:
| Section | Content |
|---|---|
| Parties | Your business name, customer name, customer address |
| Description of work | Shed dimensions, roof style, foundation type, doors/windows, siding/roof material |
| Price | Single number, broken into deposit and final |
| Timeline | Estimated start date, estimated completion (with weather contingency) |
| Payment terms | Deposit due to schedule, final due at completion before site departure |
| Change orders | Must be in writing, signed, and added to invoice |
| Warranty | 1 year on workmanship, manufacturer warranty on materials |
| Exclusions | Site prep, electrical, permits, HOA approval are customer's responsibility |
| Cancellation | Deposit refundable until materials ordered (usually 5-7 days before build); after that, non-refundable to cover material costs |
| Signature block | Both parties, dated |
The change order discipline
This is where most builders bleed margin. The customer says, mid-build, "Can you also put a little workbench in there? And a shelf above the door?" You say sure, you do it, you forget to invoice for it, and you eat $400-800 of labor and materials per "yes."
The rule: every change order is in writing, signed, and added to the invoice before work proceeds.
I keep blank change order forms in the trailer. They are half a page:
- Description of change
- Materials cost
- Labor hours
- Total addition to invoice
- Signature line for customer
The conversation: "Sure, I can add the workbench. Let me write a quick change order. It's $340 in materials and a couple hours of labor, $620 total. Sign here and I'll get started today."
If the customer balks, the answer is no. You're not their handyman.
Weather and delays
Sheds get rained out. It happens 2-4 times a year in my market. The contract needs to say:
"Estimated completion date is contingent on weather and site conditions. Builder will communicate any delays in writing. Build days lost to weather will be rescheduled to the next available date in builder's calendar."
This protects you from a customer who expected Tuesday and got Thursday. Communicate proactively. The customer who knows you're coming Thursday is fine. The customer who hears nothing for 48 hours is angry.
Refund and cancellation
Be transparent. The cancellation rule I use:
- Customer can cancel for any reason up to 5 days before scheduled build start, full deposit refund
- Within 5 days of build start, deposit refund minus actual materials cost (typically $2,500-3,500)
- After build start, no refund; work to date is billed pro-rata
Put this in the contract. Customers respect transparency. They are choosing you partly because you look honest.
When the customer doesn't pay the final
It happens, rarely. The defense is:
- Final payment is due before you leave the site — not "I'll mail you a check." Card on the spot.
- The final walk-through is structured so the customer signs off on the punch list before payment.
- If the customer refuses, you stop work. You do not "finish up the trim and bill them later."
- Mechanic's lien rights protect you in every state. Know your state's notice deadlines (often 60-120 days from last work).
I've collected the final payment on site for every build I've done.
Chapter 9 — Scaling: From 1 Shed a Month to 4
Once your first 5-10 jobs are behind you, the business stops being about whether you can build a shed. It becomes about whether you can run a business that builds sheds, which is a different question.
The revenue ladder
| Stage | Builds/month | Crews | Annual revenue | Operator role |
|---|---|---|---|---|
| Solo + helper | 1-2 | 1 (you + a helper) | $80-120K | Lead builder + everything else |
| One crew | 3-4 | 1 (you + 1 hired) | $250-350K | Builder + estimator |
| Two crews | 6-8 | 2 (one led by you, one by hired lead) | $500-700K | Estimator + sales, light building |
| Pure operator | 10-12 | 2-3 (you off tools) | $800K-1.2M | Sales, ops, marketing |
The biggest psychological shift is between one and two crews. That's where you stop being a builder who runs a business and start being a business owner who happens to build sheds.
What breaks at each stage
| Stage | What breaks first |
|---|---|
| Solo → 1 crew | Estimating bandwidth (no time to quote new jobs while building current ones) |
| 1 crew → 2 crews | Materials logistics (you cannot Pro Desk run for both crews) |
| 2 crews → 3 crews | Quality consistency (you cannot inspect every build personally) |
| 3+ crews | Cash flow (deposit-and-pay cycles get tight) |
The fix for each is process and software. ShedBuilder.ai handles the estimating bandwidth fix natively — design a shed in 10 minutes, quote in 5. The materials logistics fix is a Pro Desk account with delivery scheduling.
The software stack at scale
What you ran solo doesn't fully scale. What changes:
| Function | Solo tool | Two-crew tool |
|---|---|---|
| Design and quote | ShedBuilder.ai | ShedBuilder.ai (Pro plan with multi-user) |
| Scheduling | Google Calendar | ShedBuilder.ai pipeline + calendar view |
| Payments | Stripe link | ShedBuilder.ai proposal + deposit checkout |
| Customer comms | Text + email manually | ShedBuilder.ai with templates |
| Crew comms | Group text | Group text (still — don't overcomplicate) |
| Books | Wave or QB Solopreneur | QuickBooks Online with a bookkeeper |
You will outgrow your bank account, your insurance limits, and your accountant in that order. Plan ahead by 6 months.
When to add a second trailer
When you have two crews running, you need two trailers. The cost is real ($8-15K used, $20-30K new) but the math works at 6+ builds per month.
Each crew gets their own cut station, their own tool kit, and their own materials staging. Trying to share one trailer creates a logistics bottleneck that kills your scheduling flexibility.
The shift from "builder" to "operator"
Most builders refuse to make this shift. They're good with their hands, they like being on site, and they don't trust anyone else to hit their standard. That's fair. But staying solo caps you at $150-200K of revenue and $80-120K of personal income. That's not a business — that's a good-paying job you own.
To break through:
- Train someone else to build to your standard
- Let them lead jobs without you watching
- Inspect builds at the end, not during
- Accept that quality will be 95% of yours, not 100%, on jobs you didn't run
The trade: 95% quality at 4× volume vs. 100% quality at 1× volume. The 4× volume wins.
Adding service lines
Once two crews are humming, the natural expansion is into adjacent products:
| Product | Why it works |
|---|---|
| Garages (under threshold) | Same skills, bigger ticket ($15-30K) |
| Workshops | Same skills, even bigger ticket ($20-50K) |
| Pavilions and pergolas | Lower margin, but quick fill-in jobs |
| Lofts and porches added to existing sheds | Easy upsell to past customers |
| Permitted ADUs | The eventual destination — requires GC license, bigger leap |
ShedBuilder.ai's engine will scale with you into garages and workshops. The same framing logic works. ADUs are a future module — they require permit, plan review, and a different sales cycle.
Chapter 10 — The Mistakes That Kill New Shed Builders
Every mistake on this list is one I made or one I watched another builder make.
Mistake 1: Underpricing the first five jobs
This is the #1 killer.
You quote a $7,500 shed thinking you'll clear $2,000. You actually clear $400 because you forgot fuel, ran two extra Pro Desk trips, lost a day to rain, and ate the cost of a window that arrived cracked. You've worked 50 hours for $400, you're angry, you quit.
The fix: use the four-component pricing model from Chapter 5 on every quote, even the first one. Don't "be competitive on the first few." Be competitive on quality, response time, and presentation. The price is the price.
If you lose your first five leads, that's information. Adjust the marketing or the sales conversation. Don't adjust the price.
Mistake 2: No contract, no deposit
The customer feels nice. The relationship feels easy. They said they're good for it.
Then the build runs into rain, the date slips, the customer's wife says "let's wait until spring," and you're sitting on $3,000 of materials with no deposit and no contract. The lumber is warping in your trailer.
The fix: never start a build without a signed contract and a 50% deposit. Every time. No exception for friends, referrals, or "we shook on it." The contract protects both of you.
Mistake 3: Buying materials retail
You walk into Lowe's, fill a cart, and pay sticker price. You just gave up 5-10% of your job's margin.
The fix: register for the Pro Desk at Lowe's, Home Depot, and Menards. It's free. You get:
- Volume discounts (5-15% off list)
- Delivery scheduling
- Account billing (no swiping a card on every run)
- A dedicated rep who knows your name and your business
Every shed builder should have all three Pro accounts active. Compare prices per job and buy where it's cheapest. Sometimes that means splitting the order across two stores.
Mistake 4: Promising a date you can't hit
"I'll have it done by Saturday" — said on Wednesday before a forecast you didn't check.
Customers do not remember the build quality nearly as long as they remember the missed completion date. Two builders, identical quality, one on schedule and one a week late — the on-schedule builder gets the referral.
The fix: build a weather buffer into every quote. A 10×12 that should take three days gets quoted as "5-7 build days, weather depending." If you finish in three, you look like a hero. If it rains, you are still in your window.
Mistake 5: Skipping insurance "just for the first job"
You assume nothing will happen on a small backyard build. Then a 2×8 falls off the wall and dents the customer's car, or they trip on your extension cord and break a wrist, or a stray spark sets their fence on fire.
A single claim costs 5-10× a year of liability insurance.
The fix: get the policy before the first paid job. Hiscox or Next Insurance will issue a policy in under an hour.
Mistake 6: Saying yes to "while you're here"
"While you're here, can you also fix that fence? Hang this gate? Pressure-wash the deck?"
You say yes because the customer is nice. You eat 3-4 hours of unpaid labor on every build. Across 30 builds a year, that's 100+ hours of unbilled work.
The fix: say yes to nothing on site that isn't in the contract. The script:
"Happy to help with that. Let me write a quick change order — it's $185 to hang the gate. Sign here and I'll get it done before I leave."
If they balk: "No problem — happy to come back another time for it." Then don't.
Mistake 7: Building bigger than you can permit
The customer wants a 14×20. You build it. Three months later, the county inspector drives by, sees it doesn't have a permit, and writes a $2,400 fine. To the homeowner. Who calls you.
The fix: know your local permit threshold cold, and quote within it by default. If the customer wants bigger, you say:
"Above 200 sq ft, you'll need a permit and a stamped plan. I can do that for you, but it adds 2-4 weeks and $800-1,500 in permit costs. Want to stay at 192 sq ft and save the time?"
Most customers will downsize. The few who don't pay for the permit pathway.
Mistake 8: Not charging for travel beyond your radius
You quote a shed 90 minutes away at the same price as one 15 minutes away. You eat 3 hours of windshield time per day for the entire build. That's 9-12 unbilled hours on a 3-day build.
The fix: set a service radius (30-45 minutes is reasonable) and add a per-mile fee beyond it. Charge $1.50-3.00/mile beyond the radius, billed both ways for the entire build. Customers respect this — it is standard contractor practice.
Mistake 9: One-tier pricing
You give the customer one number. They say "let me think about it." They never call back.
The fix: always present three tiers — Good, Better, Best. Chapter 5 covers this. The middle tier wins most of the time. The customers who would have walked away at one number say yes to Good. The customers who can afford Best say yes to Best. Your close rate goes up.
Mistake 10: Trying to be the cheapest
There is always someone cheaper. There is always a guy with a beat-up pickup who will build a shed for $4,500 cash, no contract, no insurance. You cannot compete with him on price. Do not try.
The fix: compete on everything else. Response time, presentation, software-generated proposals, contract clarity, finished build quality, follow-up. Be the obvious choice for the customer who is willing to pay 50-100% more for it to be done right. There are more of those customers than there are of the cheap ones.
Mistake 11: Not asking for the review
You finish the build. The customer is thrilled. You leave. You never ask for a review.
That review is worth more than $500 of marketing. The fix is to make asking systematic:
- At final walk-through, hand the customer your phone with the Google Business Profile review page already open
- "If you have 60 seconds, a quick review really helps me out. I'll text you the link too in case you'd rather do it later."
- 24 hours later, text them the link with a thank-you note
- 90% of customers who say yes in person will leave a review within a week
Mistake 12: Letting the business eat your weekends forever
You start the business because you want flexibility. Then you find yourself quoting on Sunday nights, answering customer texts at 9 PM, and working every Saturday because that's when the customers are home.
The fix: set business hours and stick to them after the first 90 days. Customer texts after 7 PM get a response at 7 AM. Sundays are off-limits. You did not build a business to be on call 24/7.
The customers who want a builder available at 9 PM on Sunday are not the customers you want.
Chapter 11 — Your First 90 Days: A Concrete Action Plan
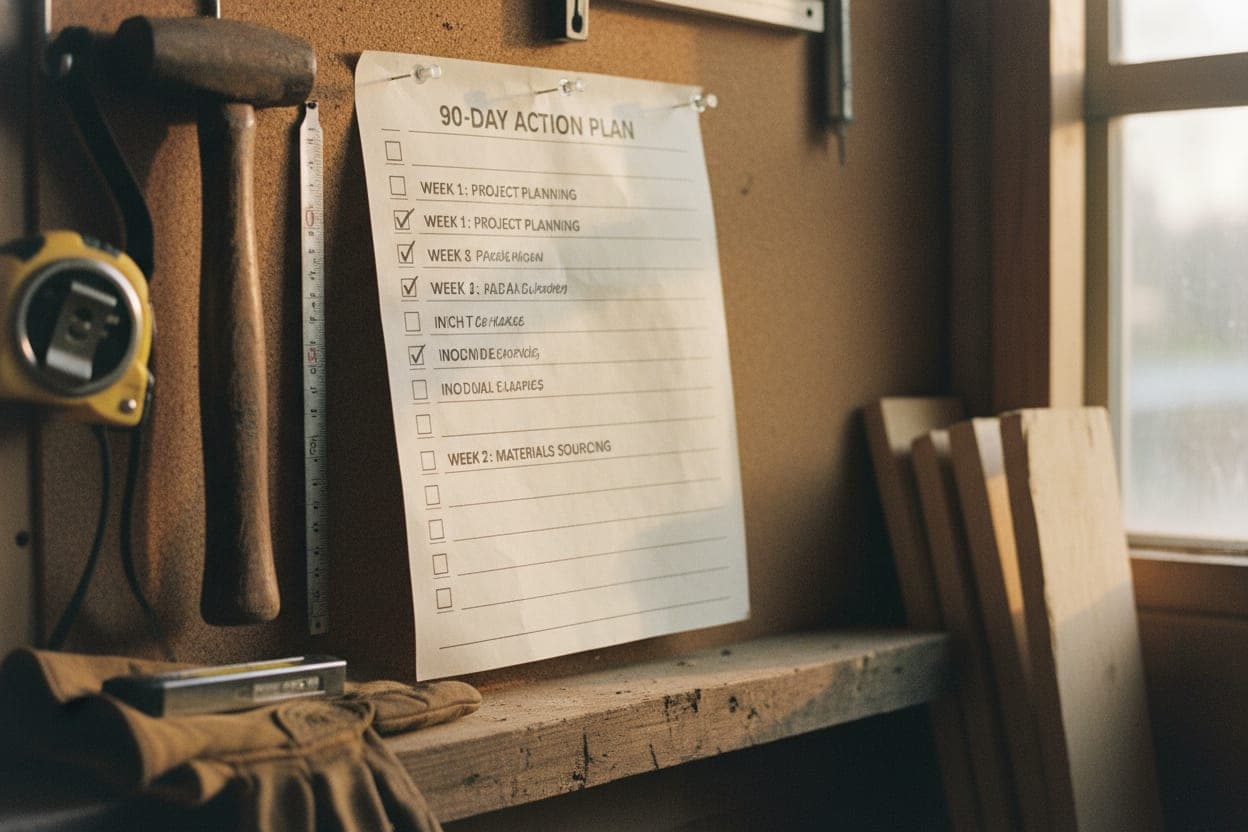
Here's the action plan. Print it. Tape it to your wall. Check the boxes as you go.
Weeks 1-2 — Foundation
| Task | Time | Cost |
|---|---|---|
| File LLC with your Secretary of State | 30 min | $50-300 |
| Apply for EIN at irs.gov | 10 min | Free |
| Open business bank account | 1 hour | Free-$25 |
| Open business credit card | 30 min | Free |
| Get liability insurance quotes (Hiscox, Next, local agent) | 1-2 hours | $1,200-2,400/yr |
| Set up Google Workspace email | 30 min | $7/mo |
| Set up OpenPhone or Google Voice business line | 30 min | $0-15/mo |
| Set up QuickBooks Solopreneur or Wave | 1 hour | $0-20/mo |
| Sign up for Lowe's, HD, Menards Pro accounts | 1 hour each | Free |
| Start ShedBuilder.ai trial | 5 min | Free 7 days |
End of week 2 deliverable: You are a legal business with insurance and a software stack.
Weeks 3-4 — Tools and practice build
| Task | Time | Cost |
|---|---|---|
| Buy the starter tool kit (Chapter 3) | One Saturday | ~$2,200 |
| Identify your practice build (your own property, a friend, or a discount-first-customer) | 1 hour | — |
| Design the practice build in ShedBuilder.ai | 30 min | (in trial) |
| Generate cut list and BOM | 5 min | (in trial) |
| Pull permits if required | 1 day | $0-200 |
| Pre-cut and bundle | 4-6 hours | — |
| Build the shed | 3-5 days | — |
| Photograph every stage | Throughout | — |
| Document with video for marketing | Throughout | — |
End of week 4 deliverable: One finished build, 30+ photos, 3-5 short videos.
Weeks 5-6 — Sales infrastructure
| Task | Time | Cost |
|---|---|---|
| Set up Google Business Profile | 1 hour | Free |
| Add photos of your practice build to GBP | 30 min | Free |
| Create a simple landing page (Vercel, Carrd, or Squarespace) | 4-8 hours | $0-30/mo |
| Set up Stripe for payments | 30 min | Free + 2.9% per transaction |
| Customize the contract template | 1 hour | Free |
| Customize the change order form | 30 min | Free |
| Build your pricing in ShedBuilder.ai crew settings | 30 min | — |
| Create 3 sample quotes (10×12, 12×16, 14×24) for portfolio | 2 hours | — |
| Join 5-10 local Facebook neighborhood groups | 1 hour | Free |
| Order 5 yard signs | 30 min | $75-100 |
| Order branded shirts (3-5) | 30 min | $80-150 |
End of week 6 deliverable: You can take a quote-to-payment in under an hour.
Weeks 7-8 — First paid customer
| Task | Outcome |
|---|---|
| Post intro in 5 Facebook neighborhood groups | 5-15 inbound DMs over 7 days |
| Respond to every inbound within 4 hours | High-intent leads filter themselves |
| Send a proposal within 24 hours of site visit | Close rate goes up by ~50% with fast response |
| Quote the first 3 jobs at your real prices | At least one will say yes |
| Collect 50% deposit on first job | You are now a real business |
| Schedule the build | Pick a 7-day weather window |
| Pre-cut and bundle the night before | Save 4 hours on site |
End of week 8 deliverable: First paid customer in your calendar.
Weeks 9-12 — Build, deliver, ask, repeat
| Task | Outcome |
|---|---|
| Execute the first paid build to spec | 3-5 build days |
| Punch list and final walk-through | Customer signs off |
| Collect final payment on site | Money lands |
| Ask for Google review on site | 80% conversion if asked at right moment |
| Post finished photos to GBP, Facebook, Instagram | More inbounds |
| Add yard sign with permission | Free advertising for 2 weeks |
| Run the numbers — actual margin vs. quoted margin | Adjust pricing if needed |
| Quote the next 2-3 jobs | Close at least one |
End of week 12 deliverable: Two paid jobs completed, 3-5 quotes in pipeline, profitable and ready to scale.
What success looks like at 90 days
- 2-3 paid builds completed
- 5+ Google reviews
- $15K-30K of revenue
- $5K-10K of profit
- 3-5 quotes in active pipeline
- Pricing model validated against real numbers
- A repeatable workflow you can run again next month
This is the floor. Plenty of builders hit 4-6 builds in their first 90 days. The plan above is the minimum, not the ceiling.
What to do at the end of 90 days
If you hit those numbers, the next 90 days are about volume. Increase your radius, add yard signs at more locations, post the second wave to Facebook groups, and start thinking about your first hire.
If you didn't, the diagnostic is almost always one of three things:
- You were not getting leads → marketing problem, increase channels
- You were getting leads but not closing → pricing or response time problem, review your quote conversations
- You were closing but losing money on jobs → pricing model problem, run Chapter 5 again
The good news: all three are fixable.
Appendix
A. State-by-State Permit Threshold Reference
Most U.S. states adopt some version of the International Residential Code with local amendments. The IRC baseline (IRC R105.2) exempts one-story accessory structures at or below 200 sq ft from a building permit. Some states are stricter (CA, NY), some have non-square-footage triggers (NC's wall-height rule), and a few have generous agricultural exemptions (PA). Counties and cities still amend the state code on top of all that, and changes happen — Laramie County, WY moved its accessory-structure threshold from 200 sq ft to 400 sq ft in late 2025, as one recent example.
IRC-baseline states (200 sq ft exemption is common; local amendments still apply): Alabama, Alaska, Arkansas, Connecticut, Delaware, Georgia, Idaho, Illinois (Chicago is separate), Indiana, Iowa, Kansas, Kentucky, Louisiana, Maine, Maryland, Massachusetts, Michigan, Minnesota, Mississippi, Missouri, Montana, Nebraska, Nevada (Clark County follows IRC), New Hampshire, New Jersey, New Mexico, North Dakota, Ohio, Oklahoma, Oregon, Rhode Island, South Carolina, South Dakota, Tennessee, Texas, Utah, Vermont, Washington (Seattle layers setbacks), West Virginia, Wisconsin, Wyoming.
States with their own pattern (verify the specifics for your address):
| State | What's different | Notes |
|---|---|---|
| North Carolina | Wall-height trigger | No state sq ft threshold. Any wall over 12 ft tall triggers a permit regardless of footprint. |
| California | 120 sq ft state baseline | Strictest in the country. Electrical and plumbing always need a permit. |
| Florida | 100–200 sq ft by county | Hurricane wind-load engineering required in coastal counties. |
| Hawaii | ~100 sq ft baseline | Hurricane tie-downs and salt-air corrosion rules common. |
| New York | NYC has its own code | NYC: ~144 sq ft. Most upstate counties follow IRC. Long Island/Westchester have their own quirks. |
| Pennsylvania | Large ag exemption | Up to 1,000 sq ft for legitimately agricultural use. Residential follows IRC. |
| Virginia | Commonly cited at 256 sq ft | More generous than IRC; verify per locality — NoVA counties layer on more rules. |
| Colorado | 120–200 sq ft by county | Mountain counties get stricter — snow load and wildfire code. |
I do not maintain a comprehensive 50-state cheat sheet because the codes change too often and the AHJ is the authoritative source no matter what a table says.
B. Tool Kit Budget Tiers
Tier 1 — Bootstrap ($1,800): Buy everything used or refurbished from Craigslist, Facebook Marketplace, and tool pawn shops. Verify everything works before paying. Save 30-40% off retail.
Tier 2 — Standard ($2,500): Mid-tier DeWalt, Milwaukee, or Makita new from Lowe's or Home Depot. Pick one battery platform and stick to it.
Tier 3 — Pro ($4,500): Add backup tools (second nailer, second circular saw), better miter saw (Bosch GCM12SD or Festool Kapex), and a portable table saw. Worth it once you're past 10 builds.
C. One-Page Contract Outline
Use this skeleton to draft your own one-page contract. Have a construction attorney in your state review the final version before you use it on a paying job.
Key sections (see Chapter 8.5 for the full breakdown):
- Parties
- Scope of work
- Price and payment terms
- Timeline
- Change orders
- Warranty
- Exclusions
- Cancellation policy
- Signatures
D. Sample 10×12 Gable Quote
E. Pro Desk Cheat Sheet — Lowe's vs. Home Depot
| Material | Lowe's typical advantage | HD typical advantage |
|---|---|---|
| Framing lumber (2×4, 2×6) | Slight edge on dimensional pine | Slight edge on SPF |
| OSB sheathing | Often equal | Sometimes better delivery scheduling |
| Roofing (architectural shingles) | Owens Corning availability | GAF availability |
| Siding (LP SmartSide) | Often in stock | Often by order |
| Doors and windows | ReliaBilt brand value | JELD-WEN selection |
| Fasteners | Spax screws stocked | Grip-Rite often cheaper |
| Hardware (Simpson Strong-Tie) | Usually equal | Usually equal |
Register for both Pro accounts. Compare per job. The split-buy strategy saves 5-10% across the year.
F. Glossary
| Term | Definition |
|---|---|
| AHJ | Authority Having Jurisdiction. Your local building department. |
| Bird's mouth | The notched cut on a rafter that sits on the top plate. |
| California corner | A three-stud corner assembly that allows insulation and drywall to wrap inside corners cleanly. |
| Cripple stud | A short stud above a header or below a window sill. |
| Double top plate | Two stacked 2× plates at the top of a wall, with corner overlap for tying walls together. |
| Header | The horizontal framing member over a door or window opening that carries the load above. |
| HOA | Homeowners' Association. Sets aesthetic and structural rules separate from building code. |
| Hurricane tie | Metal connector securing rafters or trusses to the top plate. |
| IRC | International Residential Code. The baseline building code most U.S. states adopt with amendments. |
| Jack stud (trimmer) | The shorter stud directly under each end of a header. |
| King stud | The full-height stud on either side of a door or window opening. |
| OSB | Oriented Strand Board. Common sheathing material. |
| Pro Desk | The contractor service desk at Lowe's, Home Depot, or Menards. |
| R-panel | A common profile of corrugated metal siding/roofing. |
| Rake | The sloped edge of a roof at the gable end. |
| Ridge board | The horizontal board at the peak of a gable roof. |
| Setback | The minimum distance from a property line that a structure can be placed. |
| SmartSide (LP) | Engineered wood siding by Louisiana-Pacific. Common mid-tier choice. |
| T1-11 | Plywood siding panel, vertical groove pattern. Common entry-level siding. |
| Top plate | The horizontal framing at the top of a wall. |
| Tyvek | The most common brand of housewrap, a moisture barrier behind siding. |
What to do right now
If you read this whole thing, you're already further along than most people who say they want to start a shed business.
Two things to do today.
-
Start the ShedBuilder.ai free trial and design a 10×12 in your zip code. Fifteen minutes. Watch the cut list, materials list, and price land in front of you. Cancel anytime in the first 7 days at no charge.
-
Pick the date you'll file your LLC. Put it on your calendar this week. The biggest predictor of whether someone actually starts is whether they take the first administrative step. Everything else gets easier after that one.
The customers, the tools, and the framework all exist. The only thing left is whether you start.
About the author
Adam Viccaro is the founder of ShedBuilder.ai, based in the Charlotte, NC metro. He learned how houses actually work by remodeling his first one start to finish — every wall, every system — with his dad teaching him to figure things out as he went. The 14×24 lean-to in his backyard was his first ground-up build (gym today, office tonight, eventually a tiny home for his mother-in-law to stay in when she visits), and he's designed, priced, and built a handful of sheds since, including paid jobs in the local market. The path goes through ADUs to his own house someday.
His other background is tech and product management. He spent years before this shipping software, which is where he picked up the order-of-operations thinking that shows up in the pricing model, the 90-day plan, and the "where things go wrong before they go wrong" lens of Chapter 10. He built ShedBuilder.ai because the software he needed for his own backyard build didn't exist; he writes here about the parts of running a small construction business that nobody puts in the software docs. The guide is where the two threads meet.